

How To Cut Out A Shape From An Image In Photoshop
The best way to quickly cut out an object in an image in Photoshop CC is to use the new Select and Mask feature. I volition explain how y'all can use this effectively and cut out images as fast as possible.
If you are regularly editing images, you'll want to know how to cut out objects efficiently. I often use Photoshop for editing images and video thumbnails. In the by, I used Photoshop'southward Filter Excerpt feature, but that's now been removed in Photoshop CC.

That means we accept to rely on Select and Mask to cut out images. Let's take a look at how to use Select and Mask below.
How To Use Select & Mask To Cutting Out Objects
To begin with, open Photoshop and elevate in the image you'd similar to cut out. For this tutorial, I'll be using a royalty-free image as an example.

I'll exist cut out this person past using Select and Mask. Yous can employ the same tool and follow the steps below to cut out your ain object.
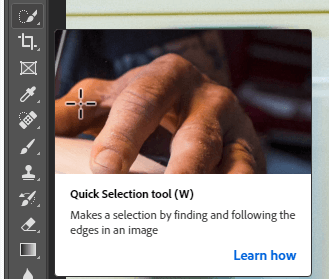
- To begin with, select the Quick select tool from the toolbar. Yous can click the tool as shown in the image above, or press the West key.

- Adjacent, click and elevate over your object with the Quick Select tool agile. The tool will intelligently stick to edges on your image, then it becomes very easy to select an entire object. You will encounter an outline of the area you are selecting every bit y'all drag your mouse.
- If yous need to brand modest adjustments, y'all can let go of the mouse push button and click each area to include information technology in your quick selection. To make minor removals, hold Alt and click on the areas you'd similar to remove from your selection.
This whole process will take nether a minute, even for circuitous images with lots of shapes, colors, and limited contrast.
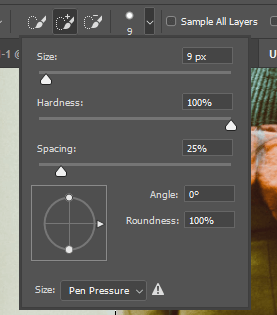
- If you need to make even more small-scale adjustments, concur Ctrl and gyre your mouse wheel up to zoom in. Next, adjust the Quick select tool castor size by clicking the brush icon in the top of the screen, as showcased in the image above.
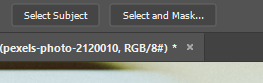
- Side by side, click Select and Mask at the tiptop of the Photoshop window. This will accept your selection and permit y'all to make farther edits to it.

On the left side, yous will see a properties tab. Y'all can accommodate these sliders to remove the background and improve the image you accept cutting out.
- Firstly, drag the transparency slider to 100% to completely remove the groundwork.

- I personally like to drag the shine slider to effectually l to create a smoother epitome. Add together effectually 5 to x px to the radius slider to add more than depth to the image too. You tin can and so click OK and your object will be cut out.
The cutting will be make clean, the image will stand out among any other background you may add together, and so long equally you lot did the quick select tool process correctly, at that place won't exist any missing pixels from your object.

- For the final step, make sure to press Ctrl+Ten and Ctrl +C to cutting and paste the selected object onto a new layer.
At this bespeak you have multiple choices. You lot can hide the background layer and relieve the prototype as a PNG with transparency. This will allow you to add this object with no background to whatsoever photo or image in the time to come.

Alternatively, you can create your own background correct in the same Photoshop tab you are in now. Just add new layers and position them as yous come across fit. As an example, I have created the image to a higher place.
Do non share my Personal Information.
Source: https://helpdeskgeek.com/how-to/how-to-cut-out-an-object-in-an-image-in-photoshop-cc/
Posted by: carrollcieved.blogspot.com
0 Response to "How To Cut Out A Shape From An Image In Photoshop"
Post a Comment