

How To Create Designs Using Filters In Photoshop
Hipster-analog photography has virtually exploded in popularity over the last couple of years, moving from something that but nerdy photography students did with a Holga to the digitalized filter-based Instagramming everyone does today.
This style of photography tin can be useful in all sorts of graphic design, only you've got to know how to transform the photo showtime. Here's how to create that Instagram filter in Adobe Photoshop in but 5 minutes.
The original
_

Beginning off by selecting a photo yous want to dispense and opening it in Photoshop. If you're using this for a projection on 99designs make sure you understand the full licensing of each image you use and declare it!
1. Add a fill up layer
_
Create an adjustment layer by using Layer > New Fill Layer > Solid Color, or by clicking on the black and white circle icon in the layers pallet and choosing Solid Colour.

In the dialog that pops up, cull a light orange color. You don't need to use exactly the aforementioned values every bit I exercise, so feel complimentary to play around with them a bit. When you lot're done, alter the Layer Blend Mode from Normal to Multiply. The result you lot become should look similar to the image above.
two. Adjust the curves
_
Select the layer with the epitome and press Ctrl+M (CMD+M on Mac ) or cull Image > Adjustments > Curves from the menu. Change the Channel to blue, then click on the small blue dot in the left bottom corner from the graph and drag it up till you become an Output value of around 150.

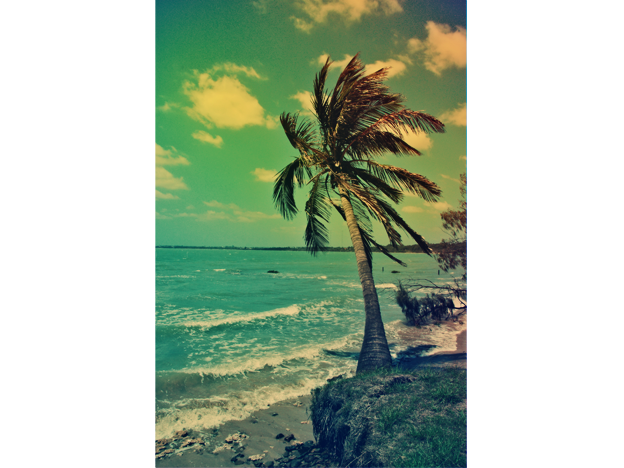
When this is done, change the Channel to green, and give information technology an Output value of around 45. Finally, switch to the red channel and change the Output value to around 15. The result should look somewhat like the image below:

We've already produced a pretty cool photograph effect, just there is some other a pocket-sized tweak we desire to use to make the photograph look even better.
three. Make information technology more vibrant
_
Select the layer with the image and press CTRL+J (CMD+J on Mac) to create a duplicate layer:

Apply a Gaussian Blur filter which you can find nether Filter > Mistiness > Gaussian Blur. You can play around with the values, merely a radius around 4 pixels should be just fine. Once you've applied the filter, you will end with something like the epitome above.
Since we don't want our Photo to look blurry, we'll change the Layer blend way to Overlay and lower the Opacity to around 50% to end up with something like this:

And that's it! Like shooting fish in a barrel, correct? Take a expect at the blitheness below to compare the original and edited photo:

4. Additional ideas
_
There is no reason to stop at this point, and then feel costless to experiment and play around with the prototype and give it your own touch. For example, you lot could utilize a slope and blend the layer via soft light. Or you could requite the photograph a vignette. Even adding but a little bit of color changes the look already dramatically, as you tin run across to a higher place in my use of yellowish and blackness.
v. Create templates
_
Once you lot've found your favorite await, you can create an Activeness or use Smart Objects to apply the issue to any of your other photos. Our tutorials on how to do this are hither:
- Primary the marvelous powers of Adobe Smart Objects
- Speed up your design process with Photoshop Actions
Share your new filtered photos in the comments!
Source: https://99designs.com/blog/design-tutorials/instagram-photo-effect/
Posted by: carrollcieved.blogspot.com
0 Response to "How To Create Designs Using Filters In Photoshop"
Post a Comment